[ Prev ]    Page:   1    2    3    4    5    6    7    8    [ Next ]

PDF version for print


IV. Installation

 
  1. Understructure --
    Under-structure: same procedure as ordinary access floor.
    1. install pedestal and bolted stringer
    2. level pedestal/stringer by laser alignment
    3. apply adhesive under pedestal base plate

  1. lay in access panels --
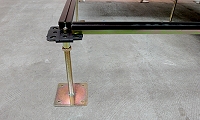
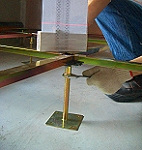
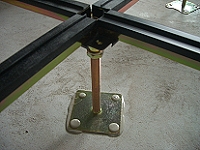
    1. lift bare panels by assistance of 3-sucker lifter.
    2. lay panels on grid in order, check  leveling in sequence.

    3. laser alignment leveling


      apply adhesives after laser alignment


      fasten fixing caps after apply adhesives

  1. perimeters --
    cut access panels for perimeters by stone tile cutter.
    1. In case last piece access panel against wall less than 15 cm is inevitable:
      suggest cover the gaps by plywood (minimum 18 mm thick), supporting by wood studs.
    2. cutting edge and perimeters: avg. 2 mm allowance to wall and sealed by 5 mm foam stripes at sides of panels.
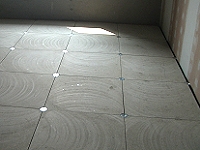
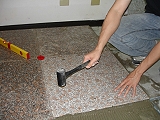
  1. top finished by -- resilient floor tiles:
    carpet tile, rubber tile, vinyl tile, and etc...
    corner-lock (optional): access panel installed either corner-locked or loose-laid.
    Bonding procedure and adhesives as per floor covering manufacturers instruction.
  1. top finished by -- stoneware tiles:
    granite, marble, porcelain tiles,
    1. clean and rinse panels' surface and stone tiles' back.
    2. apply thin-set adhesive by 10 mm square.notched trowel, coverage about 5~6 piece access panels each time.
    3. apply avg. 1 mm thick thin-set adhesive at stone tiles' back.
    4. install stone tile, insert tile spacer at angles, 2 mm gap in-between tiles forms automatically, check leveling one by one in sequence.
    5. clear thin-set residual inside the 2 mm gap in-between tiles.
    6. grout the gaps: allow 24 hours thin-set adhesive setting time before grouting.
      (follow instruction by the adhesive and grout manufacturer)


notched trowel


thin-set adhesive


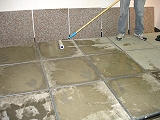
rinse panels and tiles


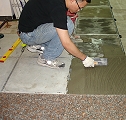
apply adhesive on panels


apply adhesives on tiles


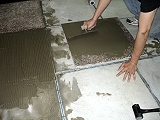
insert tile spacers, form 2 mm gap for grouting, check leveling in sequence


[ Prev ]    Page:   1    2    3    4    5    6    7    8    [ Next ]

PDF version for print


Netfloor, Inc. All Rights Reserved.